Creating an all over Pattern.
This is the 3rd of a series of tutorials which described the processes involved when creating an all over pattern using a pink flower.
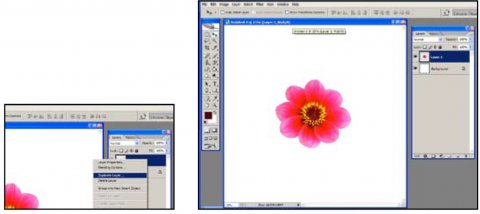
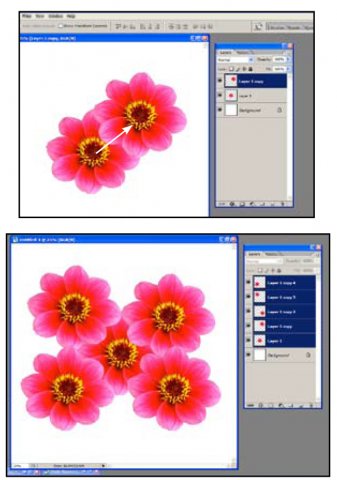
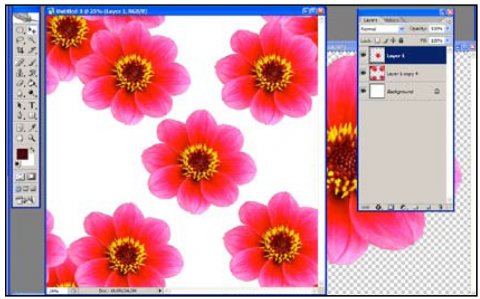
Fig 1& 2: Separate the flower from the photograph and copy into a new 20 cm X 20cm File: (See the tutorial entitled; Selecting the Flower.) Duplicate the flower layer and move the flower to another location on the page. Keep Duplicating and moving the flower, until the page starts to fill. Note: Keep the design within the page boundaries & do not let any elements disappear off the edge of the page.
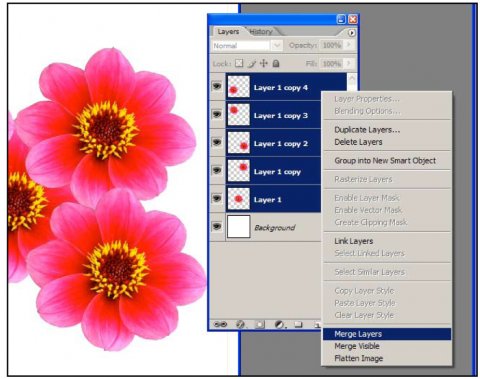
Fig 3: Once you have filled the page, Merge the Layers. (Layers Menu/Merge.)
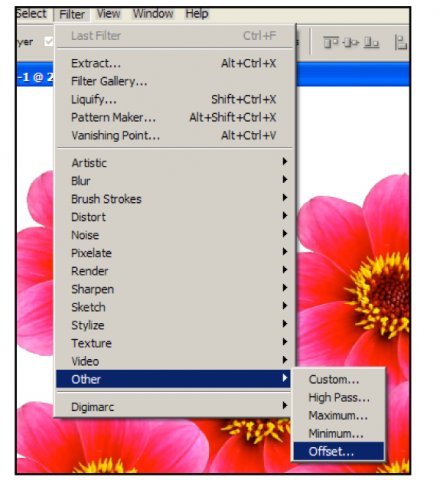
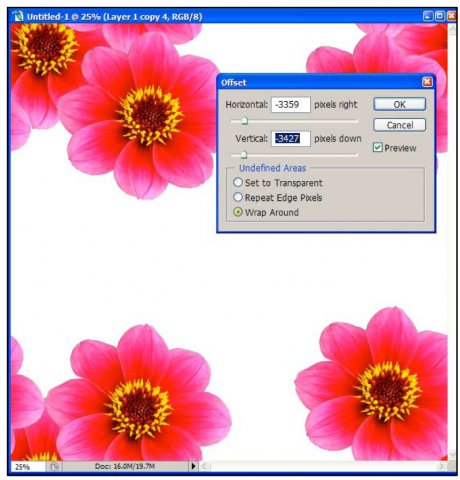
Fig 4 & 5: Offset the Pattern to find the Corners. (Filter/Other/Offset.) A Small options window will appear. Just move the sliders in any direction until the design covers the corners. You may be able to see at this stage that the corners should now repeat.
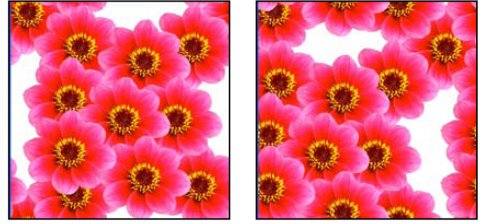
Fig 6: Copy & Paste the flower from the original file & Duplicate to fill in the gaps.
Fig 7: Once the gap in the middle is filled, Merge the layers again and Offset again to fill in the rest of the gaps. Keep doing this until the design is completely filled with flowers.
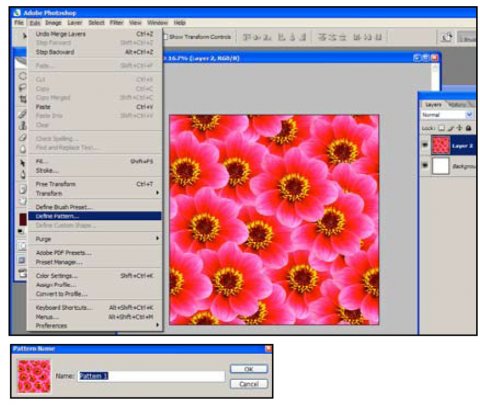
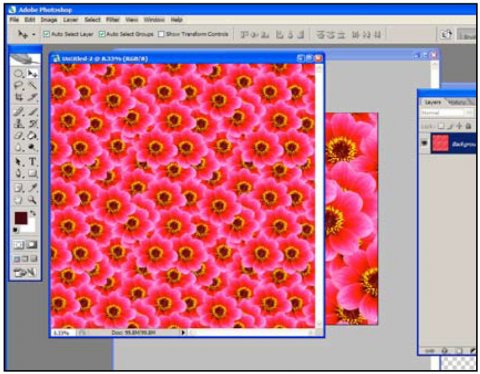
Fig 8: When the design is ready, Choose Edit/Define the Pattern. (See ‘Making a block repeat.) Then make a new bigger file, choose Edit/Fill with the pattern.
Fig 9: You should end up with a file covered in the pattern repeating perfectly.

This collection, Creating an all over Pattern., by Kenny Taylor is licensed under a Creative Commons Attribution-NonCommercial-ShareAlike 3.0 Unported license.